
How to create an end-to-end Machine Learning pipeline with AMLS (Azure Machine Learning Studio)

Write blogs about software and data.
Welcome👋!
Today let us build an end-to-end Machine learning pipeline with Microsoft Azure Machine Learning Studio.
We are using the adult income dataset.
For a more detailed tutorial, visit the official Microsoft Azure documentation.
Step1: Creating the Workspace
The first step is to create the Azure Machine Learning workspace.
Step2: Connect to workspace
Import all the dependencies
from azureml.core import Workspace, Datastore
from azureml.core import Experiment
from azureml.core import Model
import azureml.core
import pandas as pd
import numpy as np
import joblib
from sklearn.model_selection import train_test_split
from sklearn.tree import DecisionTreeClassifier
from sklearn.metrics import roc_auc_score
from sklearn.metrics import roc_curve
from sklearn import metrics
Connecting to the workspace
ws = Workspace.from_config()
print(ws)
Step3: Create an Experiment
We are naming our experiment "new-adult-exp"
# Create an Azure ML experiment in your workspace
experiment = Experiment(workspace = ws, name = "new-adult-exp")
run = experiment.start_logging()
Step4: Setting up a datastore
What's a datastore?
A datastore stores the data for the pipeline to access. A default datastore is registered to connect to the Azure Blob storage.
Azure Storage data services
The Azure Storage platform includes the following data services:
- Azure Blobs: A massively scalable object store for text and binary data. Also includes support for big data analytics through Data Lake Storage Gen2.
- Azure Files: Managed file shares for cloud or on-premises deployments.
- Azure Queues: A messaging store for reliable messaging between application components.
- Azure Tables: A NoSQL store for schemaless storage of structured data.
- Azure Disks: Block-level storage volumes for Azure VMs.
For a brief understanding of all the data storage types, I recommend following the official documentation. 👇
Setting up the datastore
#upload data by using get_default_datastore()
ds = ws.get_default_datastore()
ds.upload(src_dir='./data', target_path='data', overwrite=True, show_progress=True)

print('Done')

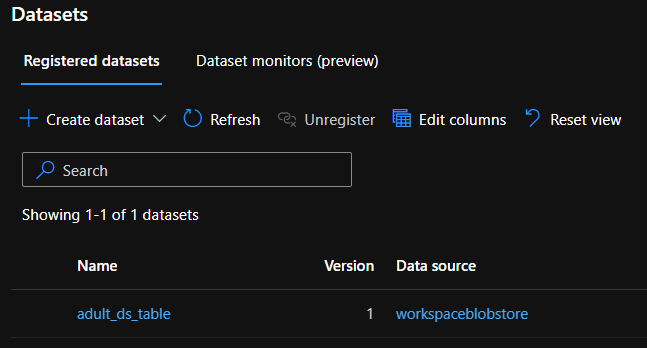
Creating the Tabular Dataset
from azureml.core import Dataset

csv_paths = [(ds, 'data/adult.csv')]
tab_ds = Dataset.Tabular.from_delimited_files(path=csv_paths)
tab_ds = tab_ds.register(workspace=ws, name='adult_ds_table',create_new_version=True)
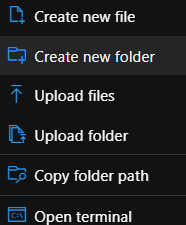
Step5: Creating a pipeline folder
Inside the User folder we have the username folder, and inside that we create a new folder pipeline that will contain all the code files.
Step6: Create Compute Target
from azureml.core.compute import ComputeTarget, AmlCompute

compute_name = "aml-compute"
vm_size = "STANDARD_NC6"
if compute_name in ws.compute_targets:
    compute_target = ws.compute_targets[compute_name]
    if compute_target and type(compute_target) is AmlCompute:
        print('Found compute target: ' + compute_name)
else:
    print('Creating a new compute target...')
    provisioning_config = AmlCompute.provisioning_configuration(vm_size=vm_size,  # STANDARD_NC6 is GPU-enabled
                                                                min_nodes=0,
                                                                max_nodes=4)
    # create the compute target
    compute_target = ComputeTarget.create(
        ws, compute_name, provisioning_config)

    # Can poll for a minimum number of nodes and for a specific timeout.
    # If no min node count is provided it will use the scale settings for the cluster
    compute_target.wait_for_completion(
        show_output=True, min_node_count=None, timeout_in_minutes=20)

    # For a more detailed view of current cluster status, use the 'status' property
    print(compute_target.status.serialize())
Step7: Loading the dataset and training
I am loading the tabular data from the Datasets under the Assets tab.
Here, I am using Random Forest classifier for classifying if the income is below 50k or more than 50k.
# Loading the dataset
from azureml.core import Run
from azureml.core import Dataset
from sklearn.ensemble import RandomForestClassifier

dataset = Dataset.get_by_name(ws, 'adult_ds_table', version='latest')

# converting our dataset to pandas dataframe
adult_data = dataset.to_pandas_dataframe()
# dropping the null values
adult_data = adult_data.dropna()

## Performing data preprocessing
df = adult_data.rename(columns={'fnlwgt': 'final-wt'})

# outlier treatment
def remove_outlier_IQR(df, field_name):
    iqr = 1.5 * (np.percentile(df[field_name], 75) -
                 np.percentile(df[field_name], 25))
    df.drop(df[df[field_name] > (
        iqr + np.percentile(df[field_name], 75))].index, inplace=True)
    df.drop(df[df[field_name] < (np.percentile(
        df[field_name], 25) - iqr)].index, inplace=True)
    return df

df2 = remove_outlier_IQR(df,'final-wt')
df_final = remove_outlier_IQR(df2, 'hours-per-week')
df_final.shape

df_final = df_final.replace({'?': 'unknown'})
cat_df = df_final.select_dtypes(exclude=[np.number, np.datetime64])
num_df = df_final.select_dtypes(exclude=[np.object, np.datetime64])
cat_df = pd.get_dummies(cat_df)
data = pd.concat([cat_df,num_df],axis=1)

from sklearn.preprocessing import StandardScaler
from sklearn.model_selection import train_test_split

X1 = data.drop(columns=['income_<=50K', 'income_>50K'])
y1 = data['income_<=50K']

# Scaling the data
scaler = StandardScaler()
scaled_df = scaler.fit_transform(X1)

X1_train, X1_test, y1_train, y1_test = train_test_split(
    scaled_df, y1, test_size=0.3)


# model training
rfm = RandomForestClassifier(random_state=10)
rfm.fit(X1_train, y1_train)
y1_pred = rfm.predict(X1_test)

print(metrics.accuracy_score(y1_test, y1_pred))
run.log('accuracy', np.float(metrics.accuracy_score(y1_test, y1_pred)))
run.log('AUC', np.float(roc_auc_score(y1_test, y1_pred)))
Step8: Register the model
The next step that is important is to register the trained model in the workspace for future model inference.
# Save the trained model
model_file = 'new-adult-income-model.pkl'
joblib.dump(value=rfm, filename=model_file)
run.upload_file(name = 'outputs/' + model_file, path_or_stream = './' + model_file)
# Complete the run
run.complete()
# Register the model
model = run.register_model(model_path='outputs/new-adult-income-model.pkl', model_name='new-adult-income-model',
                   tags={'Training context':'Inline Training'},
                   properties={'AUC': run.get_metrics()['AUC'], 'Accuracy': run.get_metrics()['accuracy']})
It is visible inside the Models section under Assets tab.

Step9: Deploying the model
The next step is to deploy the model.
Create the InferenceConfig and AciWebservice for deploying the model as a webservice and access it via the endpoints using any REST API or gRPC.
from azureml.core.webservice import AciWebservice
from azureml.core.model import InferenceConfig

import os
path = os.getcwd()
# Configure the scoring environment
script_file = os.path.join(path, "prepare.py")
env_file = os.path.join(path, "adult-income.yml")

inference_config = InferenceConfig(runtime= "python",
                                   entry_script="./prepare.py",
                                   conda_file="./adult-income.yml")
deployment_config = AciWebservice.deploy_configuration(cpu_cores = 1, memory_gb = 1)
service_name = "adult-income-service"
service = Model.deploy(ws, service_name, [model], inference_config, deployment_config, overwrite=True)
service.wait_for_deployment(True)
Here's the endpoint details under Endpoints section.
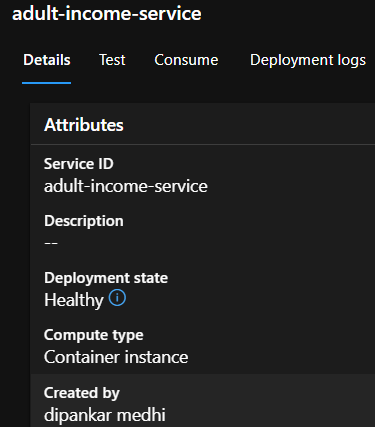
Step10: Check by sending a request
We check if our endpoint is working fine by sending a request using requests package.
import requests
import json

endpoint = service.scoring_uri
x_new = X1_test[0:1].tolist()
# Convert the array to a serializable list in a JSON document
input_json = json.dumps({"data": X1_test[0:1].tolist()})
# Set the content type
headers = { 'Content-Type':'application/json' }
response = requests.post(endpoint, data = input_json, headers = headers)
pred = json.loads(response.json())
print(pred)
output:
['above_50k']
Conclusion
This is an example showcasing the workflow of Azure Machine Learning Studio, focusing on the steps necessary to create a machine learning pipeline that utilizes the Datastore for storing the data for training and inferencing.
I will be updating this article in future by adding CI/CD functions and implementing container orchestration (like AKS).
🌎Explore, 🎓Learn, 👷♂️Build. Happy Coding💛


